
A Easy Way To Install TeamSpeak On Ubuntu Linux


A Little About TeamSpeak?
TeamSpeak is a VoIP communication application that allows multiple users to communicate with each other using voice or text-based chat. Its main idea is to allow people to communicate on a channel, similar to other conferencing apps like Zoom, Google Meet, Skype, Slack, Microsoft Teams, etc.
The target audience for TeamSpeak is gamers, who can use the software to communicate with other players on the same team of a multiplayer video game. Communicating by voice gives a competitive advantage by enabling players to keep their hands on the controls.
TeamSpeak 3 has been in development since 2004. It was a complete rewrite of TS2 with many new features, but has had infrequent updates on the development blog, and was first estimated to be released in mid-2006. The first public release of the TeamSpeak 3 SDK was on June 5, 2008, with the integrated solution in the MMO game Vendetta Online. Open beta of TeamSpeak 3 was released on December 9, 2009. Open beta was closed on August 10, 2011 and replaced with TeamSpeak 3.0.0 Final, which is the first stable release of TeamSpeak 3.
TeamSpeak 3 introduced the use of unique IDs, maintained in the program as identities, that are randomly generated at the time of a client's initial setup. An identity contains a nickname, which can be changed at any time, the Unique ID and an identity name, which is not visible to other users on the server. The unique id is used by the server to grant permissions to the user. Unique IDs replaced the need for a user to register with the server to keep their user group, be it a channel group or a server group.
How To Install TeamSpeak Server?
TeamSpeak requires you to create a user account before you can use it. You can call this user whatever you like and it doesn’t need to be logged into the system.
Open a terminal session and create the new account using this command:
sudo adduser teamspeak
This command asks you for a new password. Enter this and keep it safe as you’ll need it to log in to your server with the user account you just created. After that personal user details will be requested. You can leave them all blank if you like, just press enter for each one or fill in the details as needed.

Use wget command to download TeamSpeak server using the newly created user
su - teamspeak
wget https://files.teamspeak-services.com/releases/server/3.13.5/teamspeak3-server_linux_amd64-3.13.5.tar.bz2

Unzip the downloaded archive and copy the extracted files into the Home folder for the TeamSpeak account, then delete the downloaded file.
tar xvfj teamspeak3-server_linux_amd64-3.13.5.tar.bz2

cp teamspeak3-server_linux_amd64/* -R /home/teamspeak/

rm -rf teamspeak3-server_linux_amd64 teamspeak3-server_linux_amd64-3.13.5.tar.bz2
Now, create a blank license file called ts3server_license_accepted. It should be placed in the same folder as your executable file of Teamspeak3.
touch .ts3server_license_accepted
This file is just an empty file that will be used to indicate that the server has an active license and you are accepting the license agreement.
At this point, TeamSpeak is installed on your server but you can’t use it yet. The configuration file for the TeamSpeak server must be created before you can run it.
Now logging out of the TeamSpeak account and returning to the root user. Then create a configure file called ts3server.service in /lib/systemd/system directory as follows:
exit
sudo nano /lib/systemd/system/ts3server.service
Populate the file with the lines below:
[Unit]

Description=Teamspeak Service

Wants=network.target

[Service]

WorkingDirectory=/home/teamspeak

User=teamspeak

ExecStart=/home/teamspeak/ts3server_minimal_runscript.sh

ExecStop=/home/teamspeak/ts3server_startscript.sh stop

ExecReload=/home/teamspeak/ts3server_startscript.sh restart

Restart=always

RestartSec=15

[Install]

WantedBy=multi-user.target
Save and close the file when you are done.
Now, refresh the list of system services to apply the changes
sudo systemctl daemon-reload
Start the TeamSpeak server and allow it to start upon booting your computer.
sudo systemctl start ts3server.service

sudo systemctl enable ts3server.service
Make sure TeamSpeak is running correctly by checking the service status:
sudo systemctl status ts3server
You should see the following output:

To see what ports TeamSpeak uses, type the following command:
ss -antpl | grep ts3server

Setting an Admin Password in TeamSpeak
An administrator password is required for TeamSpeak.
Stop the TeamSpeak service and switch to TeamSpeak user.
sudo systemctl stop ts3server
su - teamspeak
Start the Teamspeak server manually and pass the serveradmin_password parameter with your password as follows
./ts3server_startscript.sh start serveradmin_password=your_password
Remember to replace your_password with your password.
Stop TeamSpeak manually after setting the password, log out the TeamSpeak user, and start the TeamSpeak service using systemctl command
./ts3server_startscript.sh stop
exit

sudo systemctl start ts3server
Installing TeamSpeak Web Interface
In order to use TeamSpeak web interface you need to install a separate component.
Login as root user, install Apache web server and PHP software packages along with the unzip package with the following commands:
sudo apt-get install apache2 -y

sudo apt-get install php libapache2-mod-php

sudo apt-get install unzip -y
Move into the Apache Root document folder and download the web UI package called ts3wi using wget command
cd /var/www/html

wget https://www.bennetrichter.de/downloads/ts3wi.zip
After downloading is complete, unzip the file and ensure the ts3wi directory has proper ownership.
unzip ts3wi.zip

chown -R www-data:www-data /var/www/html/ts3wi
Now open your web browser and navigate to http://your_server_ip/ts3wi where your_server_ip is the public IP address of your server. You will be taken to the login page.

Provide username admin and password and click Login. You will be directed to TeamSpeak web UI. You can create channels, manage users and do anything else that is the same as on the windows client.

That’s it! You have successfully installed TeamSpeak server on Ubuntu 20.04 LTS server. Find more info on TeamSpeak official website.
How To Install TeamSpeak Client?
In this method, we will install the TeamSpeak client on Ubuntu through the TeamSpeak repository.
Add TeamSpeak repository through the below command:
$ sudo add-apt-repository ppa:beardoverflow/ts3client
Enter sudo password.
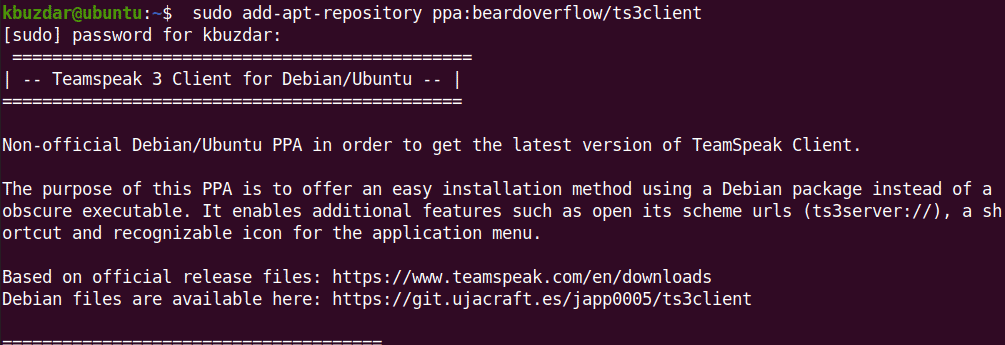
Then you will be asked to hit Enter key if you want to continue adding the repository.
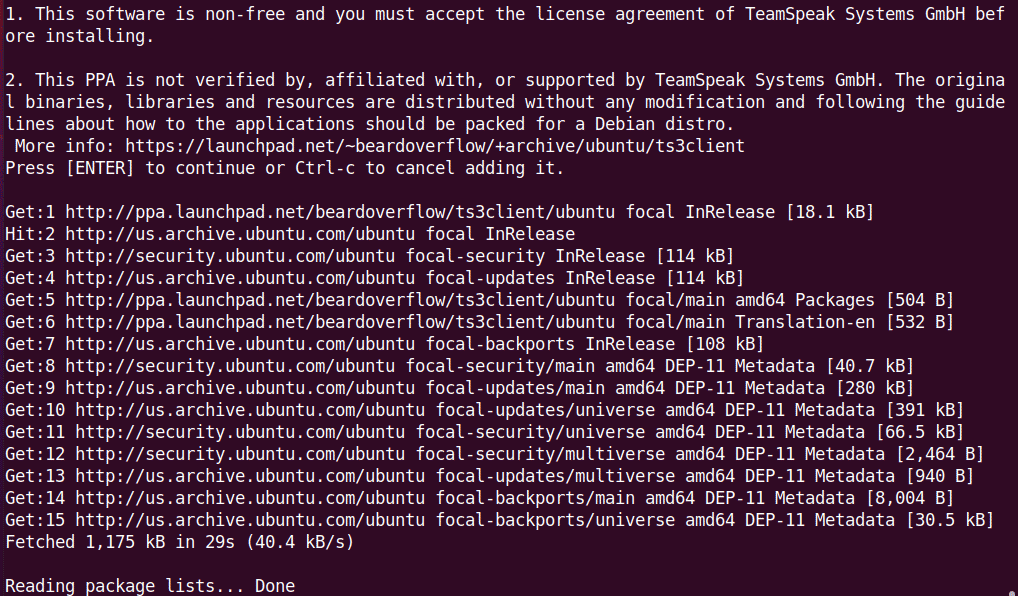
After the TeamSpeak repository is added, update the system’s repository database through the command below:
$ sudo apt update
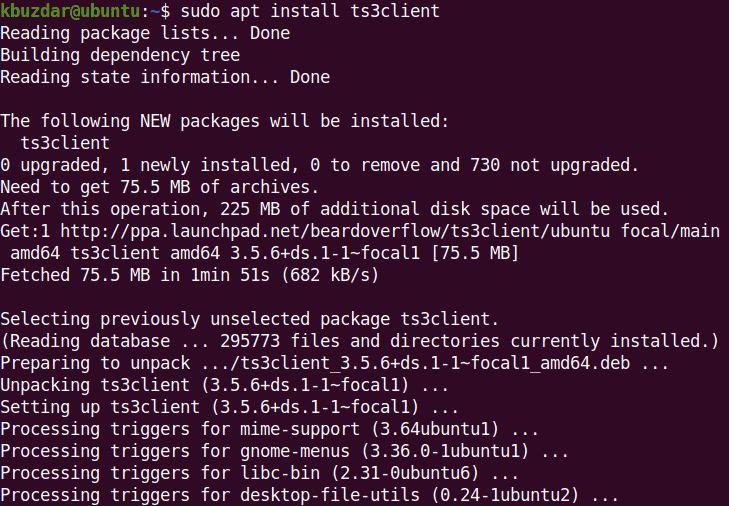
Now execute the command below in order to install the TeamSpeak client on your system:
$ sudo apt install ts3client
This should install the TeamSpeak client on your system.
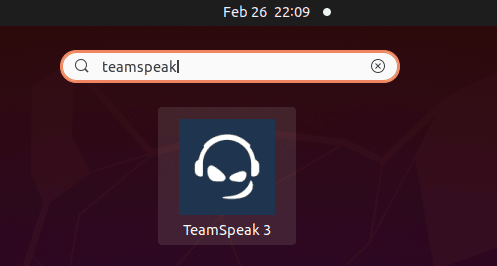
After installing the TeamSpeak client, you can launch its icon from the installed applications list. Hit the super key and type teamspeak in the search box. Then click the TeamSpeak icon to launch it.
Conclusion
You have learned how to install your own TeamSpeak instance on your server. This way, you will have full control over what happens and it is interesting for your internal use.
Another interesting tutorial may be: A Easy Way To Install FortiClient VPN [ Quick Tip ]