
Ubuntu How To Set A Static IP Via Terminal And GUI

Why do we have to set a static IP address on our Ubuntu \ Debian Linux?
The default IP address of your computer - whatever it is, is probably "dynamic". This is mostly convenient, as network administrators do not have to go through the hassle of creating individual IP addresses for each computer on their network. However, there are good reasons why you may want to set a static IP address in Ubuntu - from improved security to games, servers, faster Internet speeds and port forwarding.
In this article we will show you how to set a static IP address in Ubuntu.
Setting a IP address in Ubuntu \ Debian Linux
There are two options for setting a static address on our computer. The first is through the console, which we will look at now, and the second is through a graphical interface, which we will look at below. First open terminal and edit your network settings:
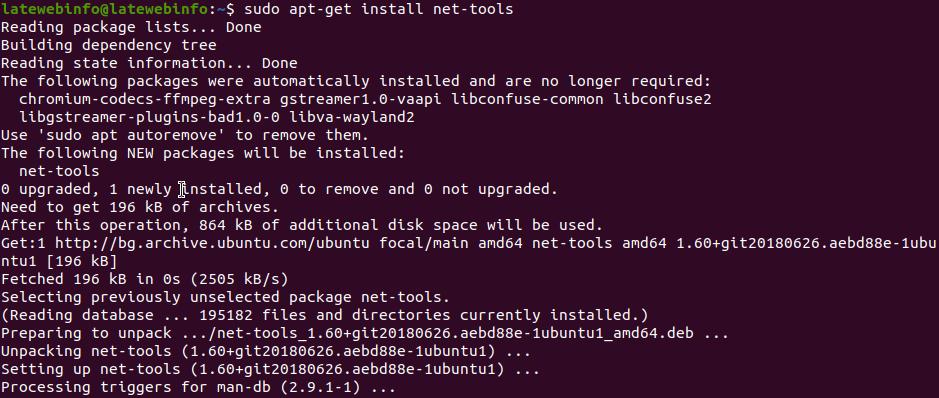
# Install net-tools to check network card name and dhcp settings
sudo apt-get install net-tools
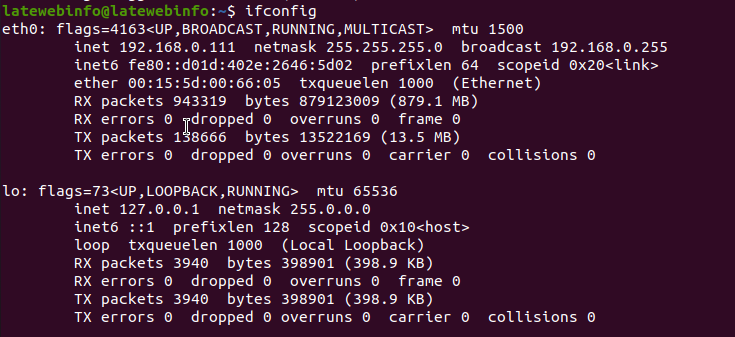
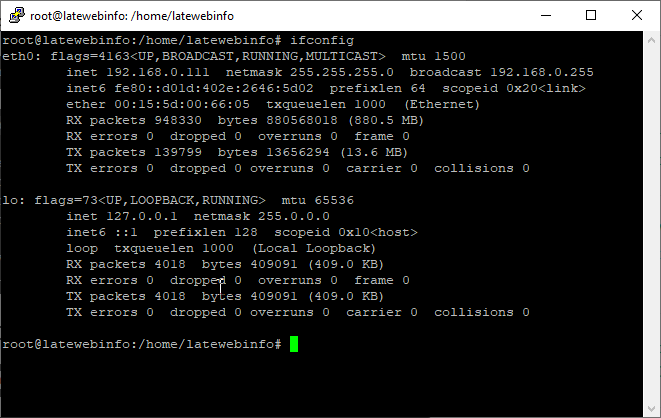
# Check network settings
ifconfig
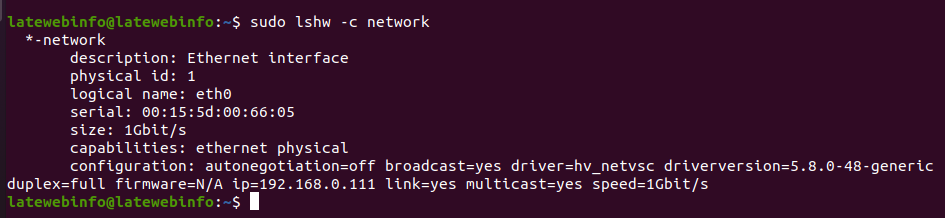
An alternative method without installing net-tools is LSHW
sudo lshw -c network
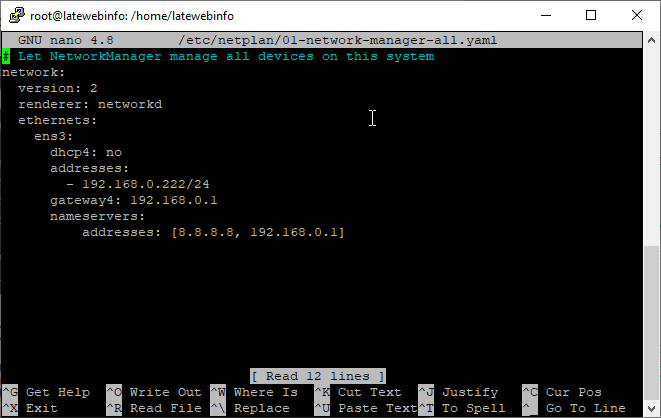
Now we have to add our network settings in 01-network-manager-all.yaml
# Edit network settings

sudo nano /etc/netplan/01-network-manager-all.yaml

# Example setup

# Let NetworkManager manage all devices on this system

network:
  version: 2
  renderer: networkd
  ethernets:
    ens3:
      dhcp4: no
      addresses:
        - 192.168.0.222/24
      gateway4: 192.168.0.1
      nameservers:
          addresses: [8.8.8.8, 192.168.0.1]
Now we have to apply settings
# Apply network settings

sudo netplan apply
And if we check with ifconfig we are going to see our new static IP address
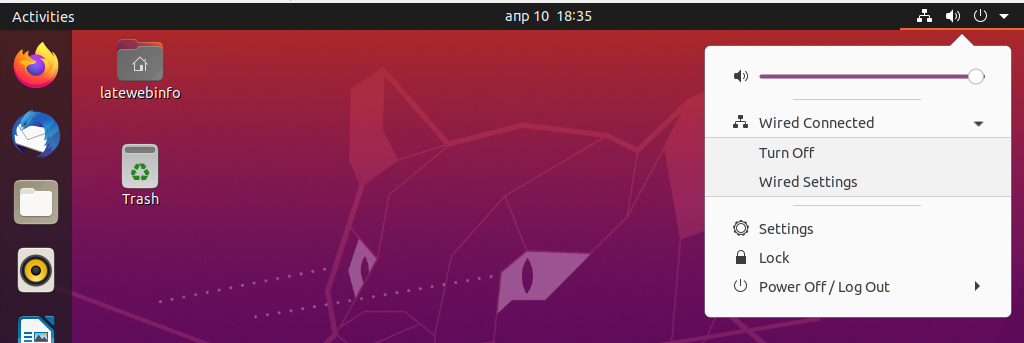
Now how to set up a static IP address using the GUI
At the top right corner you will se the network icon, click on Wired Settings:
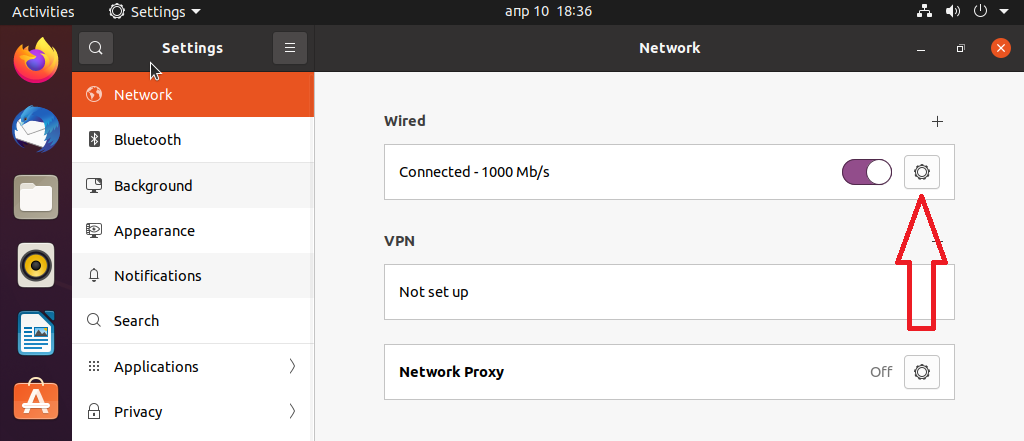
After on the gear wheel
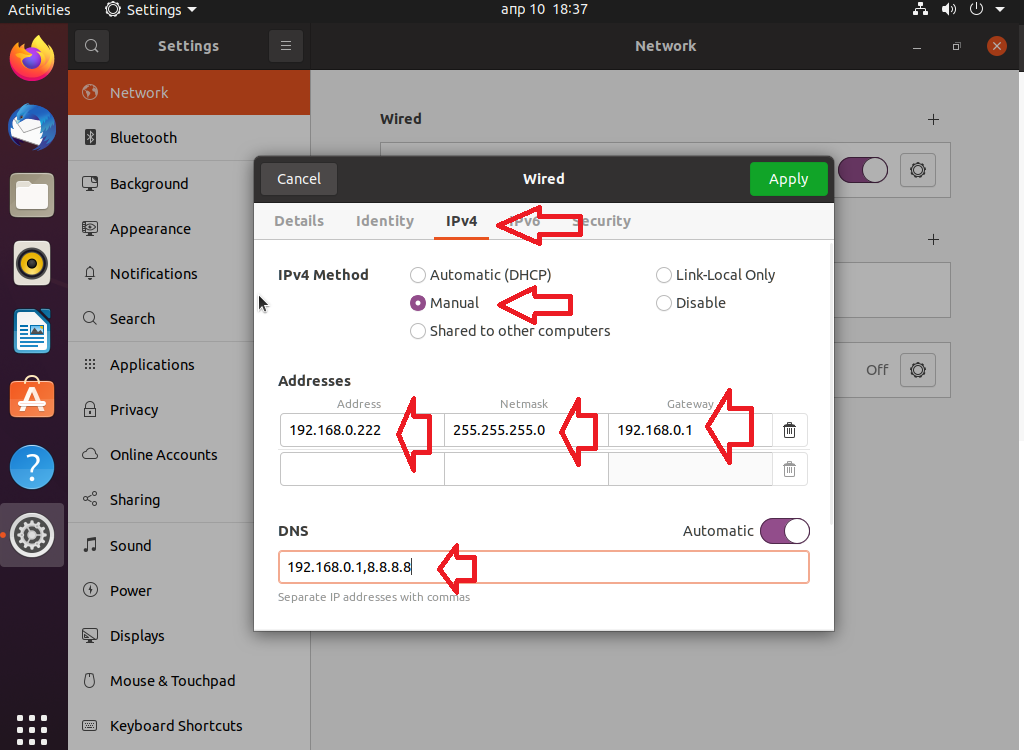
And finally click apply
Here is a video tutorial on how to set a static ip on ubuntu\debian linux
Conclusion
You will now have a static IP configuration on your Ubuntu computer. Remember that you will need to do this for each device on your network, as static IP only applies to individual devices, not the entire network.
We hope you enjoyed this article. If that is so please rate this page with the stars bellow and subscribe to our YouTube channel.